


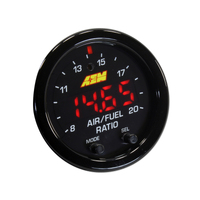
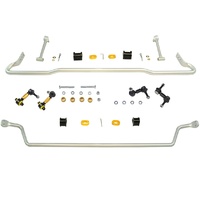
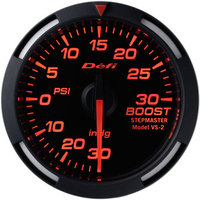
SKU: 30-0300

X-Series Wideband 02 UEGO Air Fuel Ratio Gauge Kit
5+ In Stock - Ready to Ship!
$318.20
$334.95
On Sale
Universal


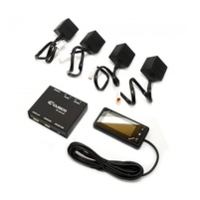
SKU: LCD-BLACK

SKU: LCD-BLACK
If you're looking for something in particular, we can help. Drop us a line using the button below.
Submit A RequestShop now. Pay Later. Interest Free.
Make 4 interest-free payments of $65.99 fortnightly and receive your order now. More info
Enjoy Now, Pay Later
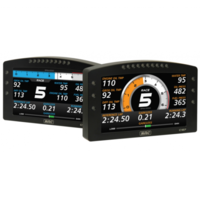
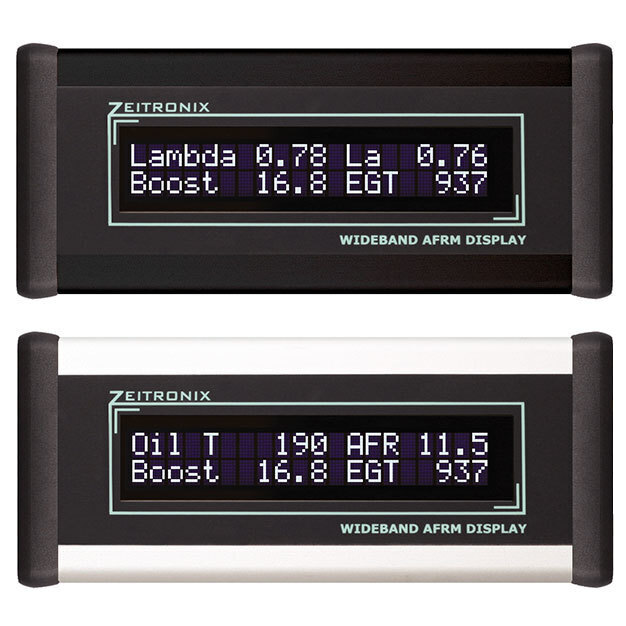
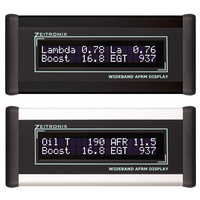
The Zeitronix LCD display is a versatile, easy to mount display for the Zeitronix Zt-2 Wideband System. The LCD display plugs in and powers up using a single 5 foot long wire connecting to the Zt-2 DATA port. There are no extra wires for power connections. The Zeitronix LCD display is available with either a silver or black aluminum case. Multiple display configurations can be created, including renaming the Zt-2's "User2" input text. User2 text can be letters numbers or symbols and is not limited to the examples given above. See below for more details on the LCD display format.
The LCD display provides a stealthy look and important tuning data in high contrast digital format. The LCD fonts are bright white on a black background. High contrast LCD digits are visible even in a direct sunlight. A push of a button located on the right side of the LCD shows peak and hold maximum AFR, Lambda, EGT, Boost and "User2" input values.
Dimensions are 4.7" x 2" x 0.9" (120 mm x 51mm x 23mm)
Zeitronix LCD Display Data Values:
Values can be display in imperial or metric units.
LCD Display Formatting:
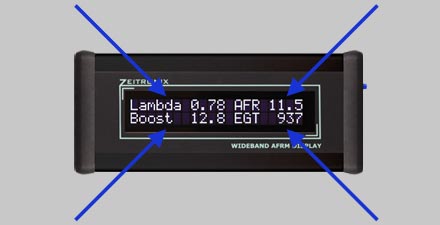
| Top Options | Top Left | Top Right |
| Option 1 | Lambda | AFR |
| Option 2 | User2 (5 character text can be renamed) | AFR |
| Option 3 | Lambda | U2 (2 character text can be renamed) |
|
|
||
| Bottom Options | Bottom Left | Bottom Right |
| Option 1 | Boost / Vacuum, Fuel Pressure, Oil Pressure | EGT |
| Option 2 | User1 (data from any 0-5 volt output sensor) | EGT |
| Option 3 | TPS (0-100% reading) | EGT |
Top row formatting can be setup by pressing and holding down the LCD button during powered up. The LCD Display questions page has details on how to choose top row contents and rename the "User2" text.
Bottom left text will display as "Boost", "User1" or "TPS" depending on the configuration. To choose between "Boost", "User1" or "TPS" a single connection is made on the Zt-2 signal harness:
The bottom right side data and text are fixed as an EGT display.
User2 / Sensors / Dual Channel AFR:
The Zt-2's "User2" input and LCD feature displaying this value were added in 2010. Please see Zt-2 2010 vs. 2009/earlier for more information on product year differences.
The User2 input supports air or fluid temperature sensors, boost/vacuum and oil/fuel pressure sensors and can be used to link in a second Zeitronix Wideband reading to create a dual channel wideband Air/Fuel ratio reading on the LCD display.
Installation:
LCD case dimensions are 4.7" x 2" x 0.9" (120 mm x 51mm x 23mm). The single power/data cable is located on the right side (back bottom corner of the display) and is 5 feet (1.5 meters) long. The data cable is thin, black and easily blends in with the dash. Installation is as simple as using double sided tape or Velcro allowing for a removable and secure display.
Please visit our customer gallery for some unique ideas and pictures of LCD installations.
Case Removal:
LCD display internals are removable with inner dimensions of 4.7" x 2" x 0.7" (120 mm x 51mm x 18mm).
To remove the LCD display from its case start by removing the two (2) screws from the right side LCD display. Carefully slide the display out while pushing down slightly on the inner LCD display module. This will prevent the inner LCD display from getting scratched on the edge of the case during removal.
Please make sure to take all possible static electricity precautions when handling the LCD display without its protective case.
If reinserting the LCD display back into the case make sure to push down slightly on the inner LCD display module to prevent possible scratches from the edge of the case.

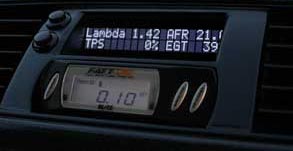
Stylish / Stealthy LCD installations (no outer case)
The Zeitronix LCD display is a versatile, easy to mount display for the Zeitronix Zt-2 Wideband System. The LCD display plugs in and powers up using a single 5 foot long wire connecting to the Zt-2 DATA port. There are no extra wires for power connections. The Zeitronix LCD display is available with either a silver or black aluminum case. Multiple display configurations can be created, including renaming the Zt-2's "User2" input text. User2 text can be letters numbers or symbols and is not limited to the examples given above. See below for more details on the LCD display format.
The LCD display provides a stealthy look and important tuning data in high contrast digital format. The LCD fonts are bright white on a black background. High contrast LCD digits are visible even in a direct sunlight. A push of a button located on the right side of the LCD shows peak and hold maximum AFR, Lambda, EGT, Boost and "User2" input values.
Dimensions are 4.7" x 2" x 0.9" (120 mm x 51mm x 23mm)
Zeitronix LCD Display Data Values:
Values can be display in imperial or metric units.
LCD Display Formatting:
| Top Options | Top Left | Top Right |
| Option 1 | Lambda | AFR |
| Option 2 | User2 (5 character text can be renamed) | AFR |
| Option 3 | Lambda | U2 (2 character text can be renamed) |
|
|
||
| Bottom Options | Bottom Left | Bottom Right |
| Option 1 | Boost / Vacuum, Fuel Pressure, Oil Pressure | EGT |
| Option 2 | User1 (data from any 0-5 volt output sensor) | EGT |
| Option 3 | TPS (0-100% reading) | EGT |
Top row formatting can be setup by pressing and holding down the LCD button during powered up. The LCD Display questions page has details on how to choose top row contents and rename the "User2" text.
Bottom left text will display as "Boost", "User1" or "TPS" depending on the configuration. To choose between "Boost", "User1" or "TPS" a single connection is made on the Zt-2 signal harness:
The bottom right side data and text are fixed as an EGT display.
User2 / Sensors / Dual Channel AFR:
The Zt-2's "User2" input and LCD feature displaying this value were added in 2010. Please see Zt-2 2010 vs. 2009/earlier for more information on product year differences.
The User2 input supports air or fluid temperature sensors, boost/vacuum and oil/fuel pressure sensors and can be used to link in a second Zeitronix Wideband reading to create a dual channel wideband Air/Fuel ratio reading on the LCD display.
Installation:
LCD case dimensions are 4.7" x 2" x 0.9" (120 mm x 51mm x 23mm). The single power/data cable is located on the right side (back bottom corner of the display) and is 5 feet (1.5 meters) long. The data cable is thin, black and easily blends in with the dash. Installation is as simple as using double sided tape or Velcro allowing for a removable and secure display.
Please visit our customer gallery for some unique ideas and pictures of LCD installations.
Case Removal:
LCD display internals are removable with inner dimensions of 4.7" x 2" x 0.7" (120 mm x 51mm x 18mm).
To remove the LCD display from its case start by removing the two (2) screws from the right side LCD display. Carefully slide the display out while pushing down slightly on the inner LCD display module. This will prevent the inner LCD display from getting scratched on the edge of the case during removal.
Please make sure to take all possible static electricity precautions when handling the LCD display without its protective case.
If reinserting the LCD display back into the case make sure to push down slightly on the inner LCD display module to prevent possible scratches from the edge of the case.
Stylish / Stealthy LCD installations (no outer case)
SKU: 30-0300
X-Series Wideband 02 UEGO Air Fuel Ratio Gauge Kit
$318.20
$334.95
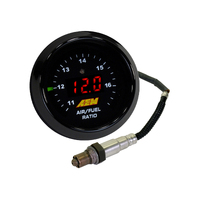
SKU: 30-4110
Wideband O2 Air/Fuel UEGO Gauge Kit
$379.95
$399.95
SKU: 3918

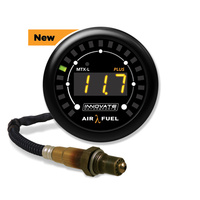
MTX-L PLUS Digital Air/Fuel Ratio Gauge Kit, 8 ft. w/O2 Sens
$431.96
$479.95

SKU: 30-0334
X-Series Wideband UEGO AFR Gauge W/OBDII Connectivity
$455.95
$479.95

SKU: 30-4110NS
Digital Wideband UEGO Gauge without Sensor
$208.95
$219.95

Add your favourites to cart

Select Afterpay at checkout

Log into or create your Afterpay account, with instant approval decision

Your purchase will be split into 4 payments, payable every 2 weeks
All you need to apply is to have a debit or credit card, to be over 18 years of age, and to be a resident of country offering Afterpay
Late fees and additional eligibility criteria apply. The first payment may be due at the time of purchase
For complete terms visit afterpay.com/terms